Month: July 2013

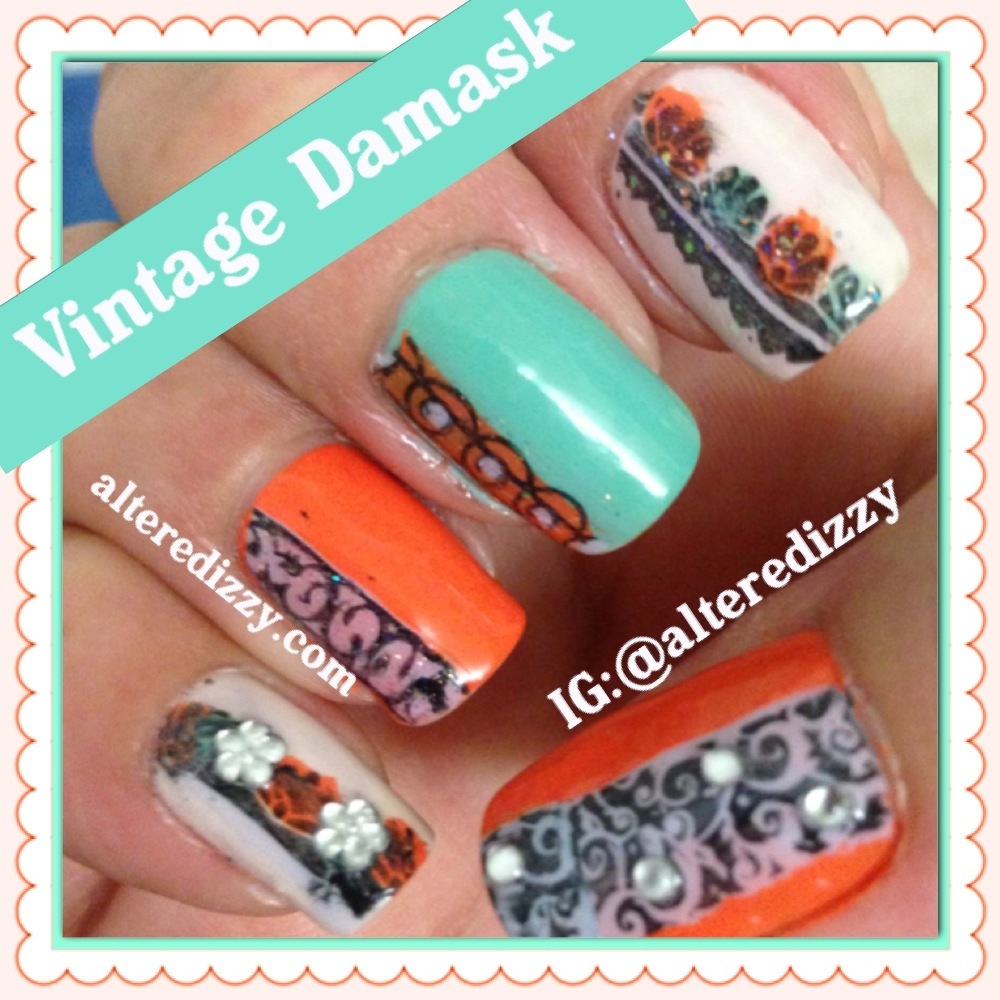
Vintage Damask Nails

Wow, it has been a while since I posted on the blog, I work in education and have been on summer vacation since the end of June, I may have been a little lazy since then lol. That being said, today my manicure is reminiscent of a vintage damask cloth, damask is a woven fabric with a pattern that is visible on both sides. It also reminds me of vintage tea towels from the 70’s, so an orange and teal colour pallet it is!
20130722-223849.jpg
I used the reverse stamping technique again, seriously this is the best technique ever! I’m not 100% in love with this mani but it is a fun colour pallet and I wore it for nearly a week!

For this look I used:
Seche Vite Top Coat
Revlon cloud, eclectic
Sally Hansen Xtreme Wear perky pink
Maybelline Color Show sweet clementine
Ice shell pink
Essence date in the moonlight
O.P.I. Fast dry top coat

Plates used:
Pueen 38, 48

The rhinestones I used are from my huge haul from Cheeky.

Up next on the blog is a pink art nouveau manicure!

Reverse Stamping Sari Print Manicure

Hello readers!! Today I have a super duper exciting manicure and new technique to show you! I’m calling it Reverse Stamping and I discovered it on the amazing Art of Nail blog! This woman is a genius! You start off your stamping process as usual: put the polish on the plate, scrape off the excess, use your stamper to pick up the design. Here comes the genius part: take coloured polish and paint directly onto the loaded stamper!!!!! What????? Madness?!?!? Wait for it! We are not done ladies and er, gents! Once the polish dries on the stamper: YOU STAMP YOUR NAIL!!!! This is stamping in colour people! We have gone from the dot matrix printer to a full on colour laser printer! Ok, I’m really excited about this and, I’m sure plenty of others have already figured this out but I had not.
So, here it is my Reverse Stamping Sari Print manicure:

20130708-120500.jpg
I love love love the way this turned out and I ended up wearing it for almost a whole week. In fact, I’m still wearing it as I type up this post. The key to success with this technique is using as little polish as humanly possible while still applying enough colour to the stamper using only one stroke. The more polish you leave on the stamper the blurrier your outline becomes.
Have any of you tried this technique? If so let me know how it turned out! Don’t forget to check out the gifted artist who inspired this manicure and get the tutorial on her blog “>Art of Nail
Not sure what to do next but I’m pretty sure it will involve some colour printing

Magical Unicorns

As promised in my last post here come the unicorns! I’m not usually a unicorn type of girl but lately I’ve been digging pastels and for some reason it also makes me think of a unicorn colour pallet. I started with some pastel base colours and a metallic accent, on the pastel blue index fingers I finally got around to using an O.P.I. glitter from the Wizard of Oz collection. I then stamped on some designs from my Winstonia and Pueen nail plate sets. I wanted the thumb and pinkie to look like my unicorn was running then leaping into the air, so I changed the orientation of my stamp before applying it to the nail. Added some bling and a top coat and Bam! Chapter!

20130704-112420.jpg
I love the way this turned out, this may be a little too girly for some but I really liked wearing it out and I received a few compliments on them. Whoot! Whoot!

For this look I used:
Seche Vite Base Coat
Revlon cloud, sunshine sparkle, vixen
Sally Hansen Xtreme Wear bubble gum pink, celeb city
Hard Candy crush on raisin
O.P.I. Lights of Emerald City
O.P.I. Rapid Dry Top Coat

Nail plates used:
Winstonia W111, W117
Pueen 46

Stay tuned, I will be trying out a new stamping technique for my next manicure it should be interesting…